Transfer Application
This page has been published to give advice and guidance to those customers using our transfers
Scroll down the page or click on a 'link' below:
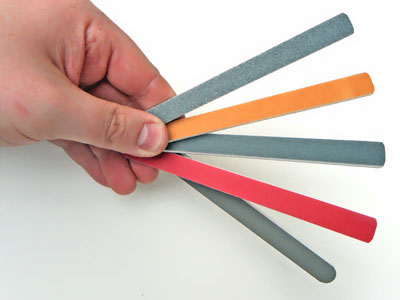
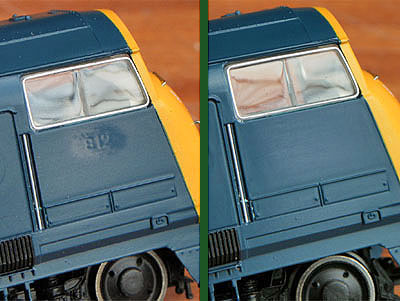
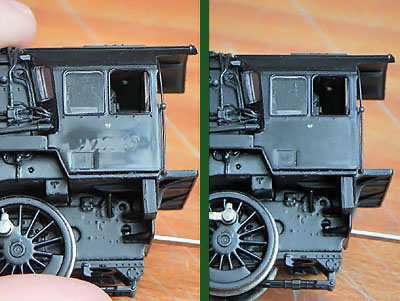
METHODS TO REMOVE PRINTED IMAGES & NUMBERS
WATERSLIDE & RUB-ON ('STANDARD' OR COLOUR) TRANSFER APPLICATION
WATERSLIDE & RUB-ON TRANSFER EXAMPLES
|
|
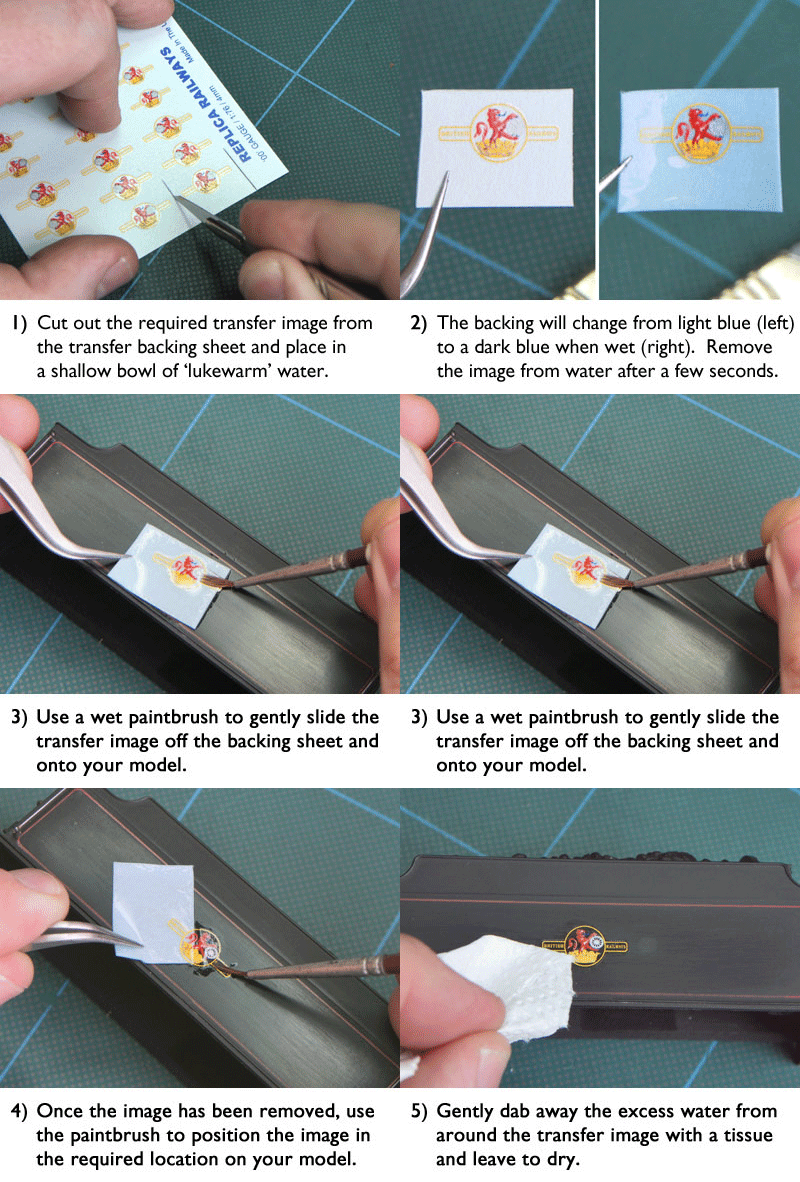
WATERSLIDE TRANSFER APPLICATIONWaterslide transfer images will adhere better to a gloss surface. To achieve an ‘even’ finish (a balance of gloss waterslide image to paintwork) it is recommended, though not essential, to first apply gloss varnish to your model. Take the desired image and cut it from the transfer sheet. After soaking the image for a few seconds in lukewarm water - slide the transfer image off the backing paper using a moist paintbrush and adjust to the required position. Carefully blot dry the excess water from around the transfer image with a tissue. |
 |
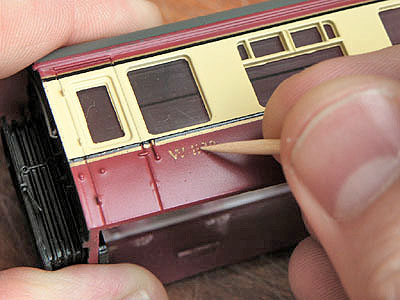
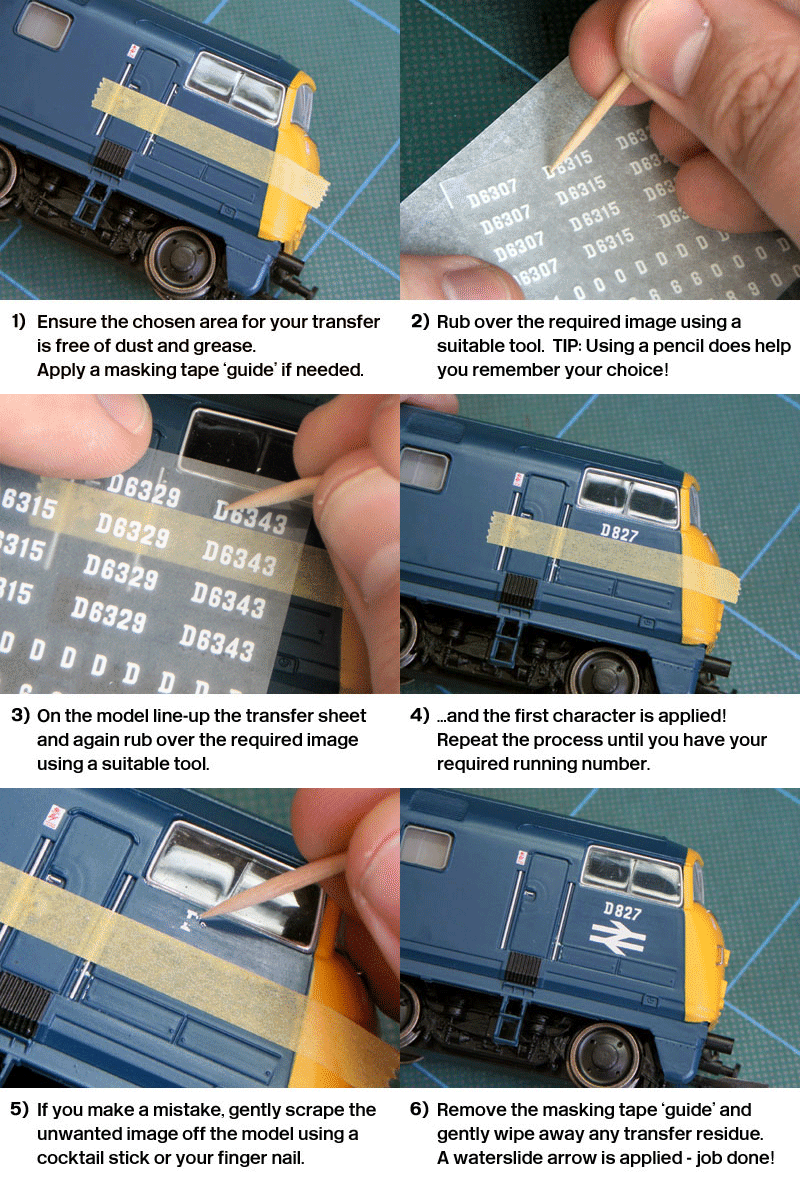
RUB-ON DRY TRANSFER APPLICATIONYou will need a suitable tool to separate the image from the transfer sheet, for this example we have used a cocktail stick. We would also recommend using a pencil or a ballpoint pen that’s run out of ink. |
|
|
Once you have ensured that the area you have chosen to place the transfer image is clean and free of dust, remove the transfer sheet and tissue paper from the packaging. On a flat surface, place the tissue paper under the transfer sheet and using your chosen tool, GENTLY and EVENLY rub over your required image. The image should now appear less vivid or slightly translucent. Your image is now ready to be placed on your model. Remove the transfer sheet from the tissue paper and move your required image into position on your model. Again, using your chosen tool, rub GENTLY and EVENLY over the image – pay attention and try to keep within the extents of the image as pressure on your model may result in the buffing/shining of the paintwork. If you make a mistake when applying your transfer image, simply remove the unwanted image by scraping gently with a lightly-abrasive material – using a wooden cocktail stick works well or alternatively you can remove the image using your fingernail. |
 |
|
FOR THOSE WHO'VE NOTICED: THESE IMAGES WERE TAKEN BEFORE BACHMANN'S ANNOUNCEMENT TO PRODUCE THIS PARTICULAR LOCOMOTIVE (32-056DC) - SO THIS MODEL OF 'KELLY' HAS SINCE BEEN STRIPPED AND WILL NOW RE-APPEAR AS A GREEN WITH HALF YELLOW LIVERIED 'CHAMPION' WITH TRI-CODE INDICATOR PANEL... |
|
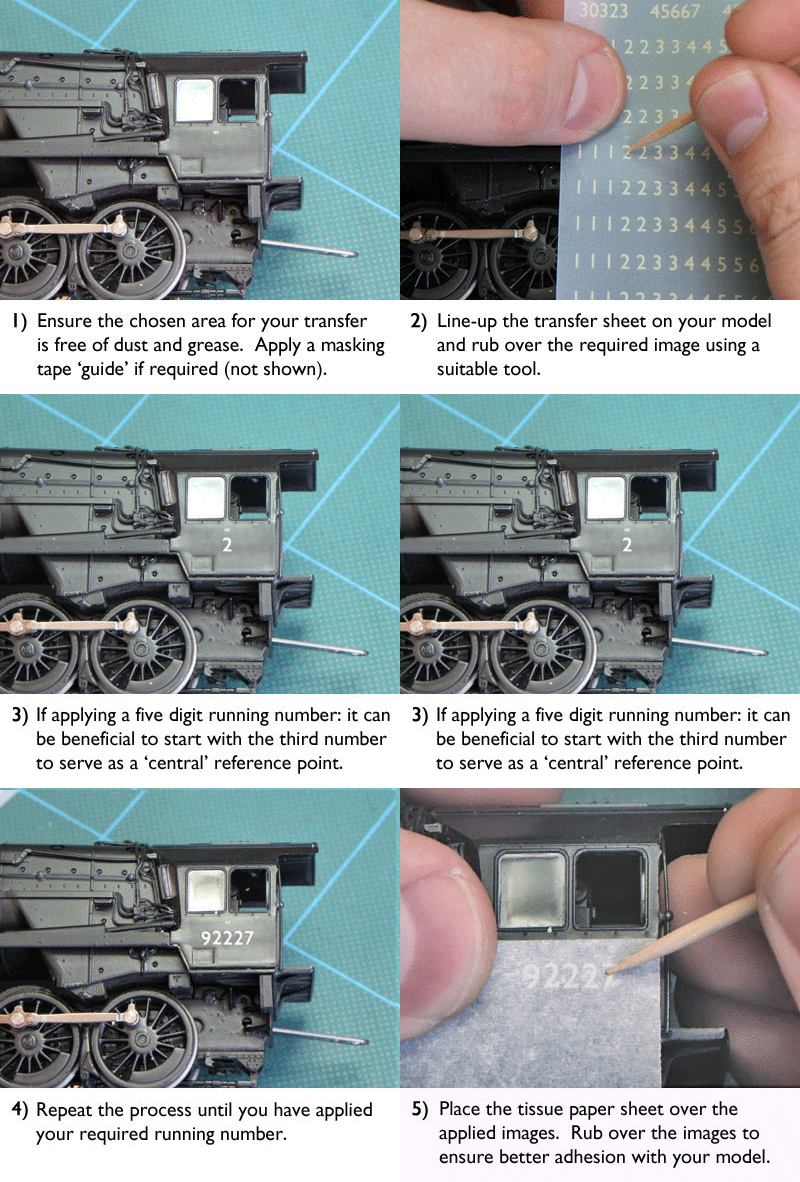
RUB-ON DRY TRANSFER (COLOUR) APPLICATIONNB: APPLICATION OF ‘COLOUR’ DECALS DIFFERS FROM OUR STANDARD ‘WHITE’ OR ‘BLACK’ RUB-ON DECALS You will need a suitable tool to separate the image from the transfer sheet – the material composition of the tool should not be too hard. For this example we have used a cocktail stick. We would also recommend using a soft graphite pencil. Ensure that the area you have chosen to place the transfer image is clean and free of dust. Remove the transfer sheet and tissue paper from the packaging. |
|
|
The transfer sheet carrier film is not as pliable as that of our Black or White rub-on numbers. We recommend that you cut the transfer carrier film into smaller sections to aid accurate positioning. Please be aware that the carrier film may distort the image if not positioned evenly and held in place during application – ensure that you cut the sheet into sections large enough for you to handle. Position the transfer sheet on your model and using your chosen tool, GENTLY and EVENLY rub over your required image. The image should now appear less vivid or slightly translucent. Try to keep within the extents of the image as unwanted adhesive from the transfer sheet may be transferred on to your model. Next, take the sheet of tissue paper and place over the applied transfer image. Again, using your chosen tool, rub GENTLY and EVENLY over the image – this will ensure better adhesion between the image and your model. If you make a mistake during application, simply remove the unwanted image by scraping gently with a lightly-abrasive material – using a wooden cocktail stick works well. Try to avoid ‘spreading’ the unwanted image when trying to remove it – short strokes to remove a small amount then clean tool (repeat as needed). |
 |
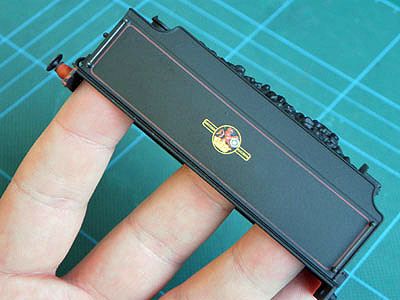
Finishing Your ModelTo finish your model we recommend that you apply a coat of varnish for complete protection of any transfer image. Applying varnish will help you level the surface of your model for weathering (see below). If you have previously applied gloss varnish and then used waterslide decals, you may wish to now apply a coat of matt or satin varnish - once the transfer image and area have been allowed to dry fully. It is not essential to apply varnish if you are keeping your model in its ‘pristine’ condition and that you are not actively handling it on a regular basis. |
 |
A Note On 'Weathering'...If you are planning to use weathering products over transfers you have applied, we recommend that you first apply a coat of varnish to your model to level the height between the transfer image(s) and paintwork. N.B: Failure to apply a 'protective' layer may result in transfer images being accidentally removed when applying weathering powders, dry-brushing or applying water-based paint. Techniques such as dry-brushing may also highlight the edges of the transfer images by default that they are irregular to the body side (like a rivet, door line, grill etc.) and a build up of weathering materials may then surround your applied images. |
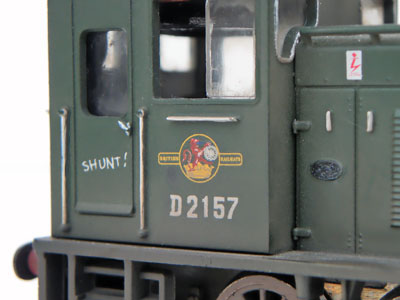 |
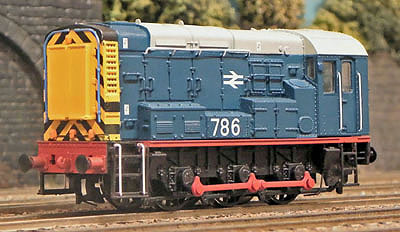
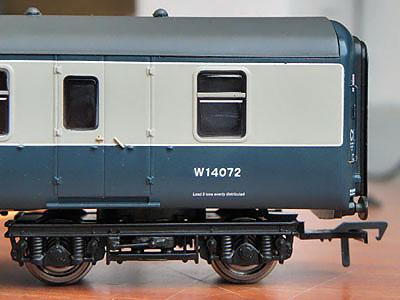
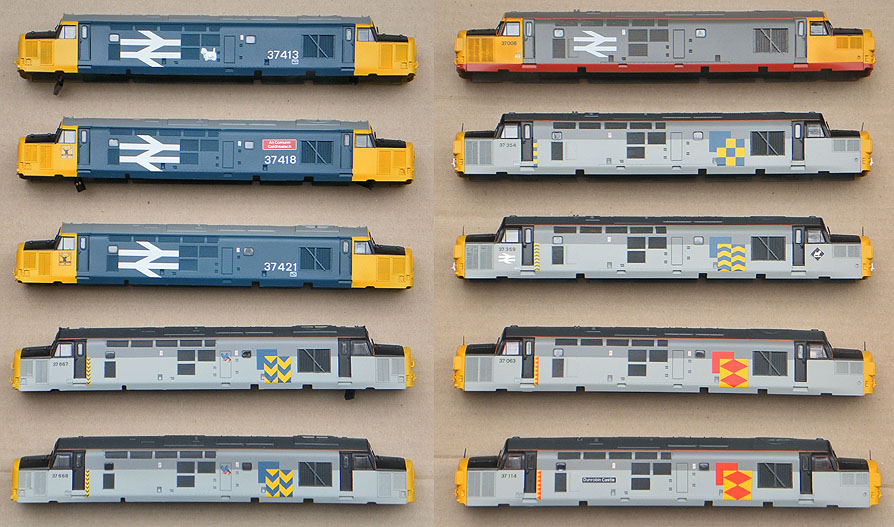
EXAMPLES OF WATERSLIDE & RUB-ON TRANSFER APPLICATIONSShown below are just a few examples of Replica Railways transfers applied to various models. |
|
 |
 |
| Bachmann Class 08 Shunter re-paint (Thornaby) Re-liveried using Replica Railways waterslide and rub-on transfers MODEL SHOWN COURTESY OF N. CROMBIE |
Bachmann MK2a Coach re-numbered with numbers from Replica Railways rub-on transfer sheet RTDP08 |
 |
|
| A selection of Bachmann Class 37s bodyshell re-paints - re-liveried using Replica Railways waterslide and rub-on transfers MODELS SHOWN COURTESY OF N. CROMBIE |
|
 |
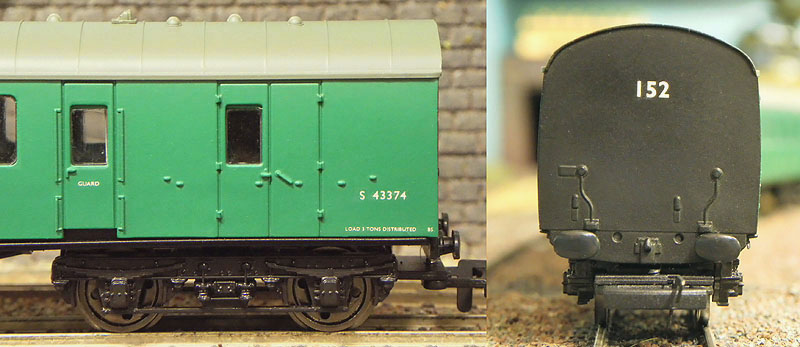 |
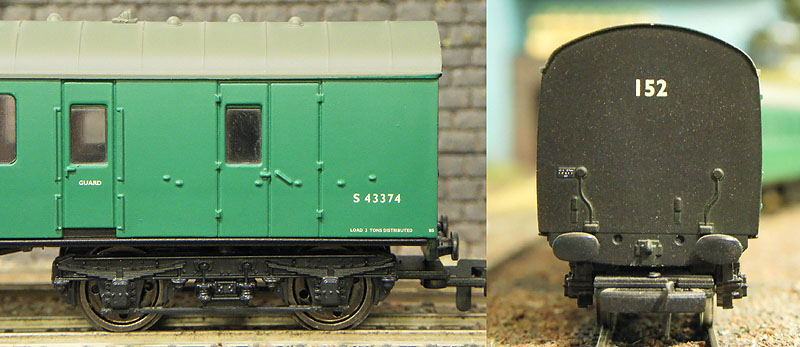
| Replica Railways Suburban Brake Second Coach with numbers from Replica Railways rub-on colour transfer sheet RTDP23. One coach has the transfer images applied, the other coach has the numbers printed on (from 3-car set 12591) - can you spot the differences? |
|
 |
 |
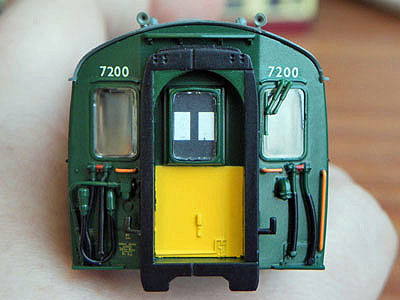
| Bachmann 4CEP Motor Driving Coach re-numbered with numbers from Replica Railways rub-on transfer sheet RTDP28 |
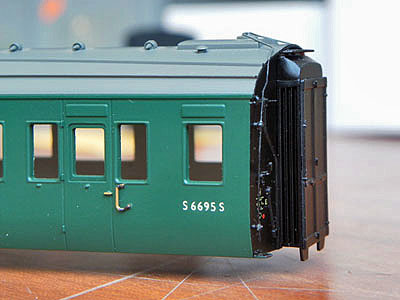
Hornby Maunsell Coach re-numbered with numbers from Replica Railways rub-on transfer sheet RTDP28 (pull-push project) |
If you have any questions concerning the contents on this page please e-mail us at This email address is being protected from spambots. You need JavaScript enabled to view it.. |

